Introduction
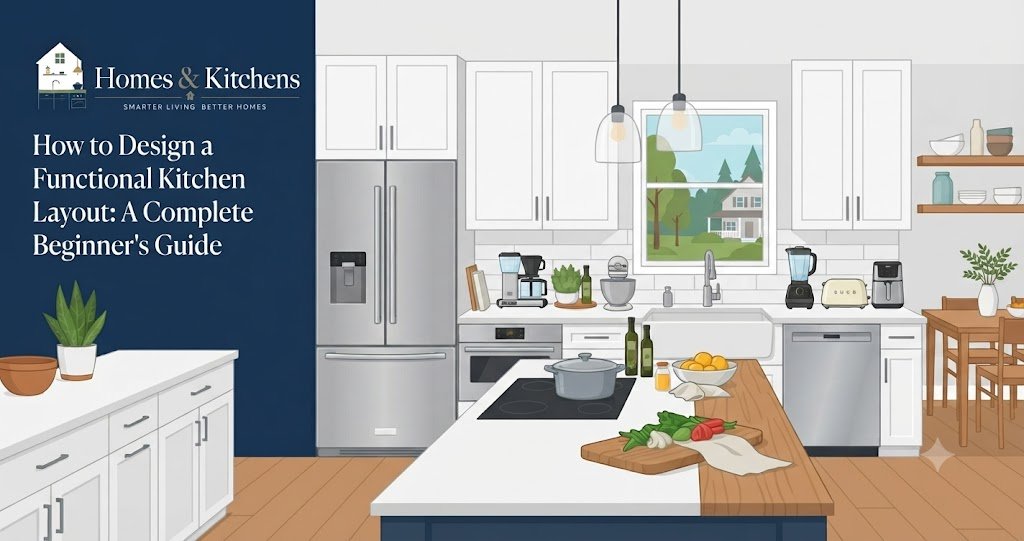
If you walk into a poorly designed kitchen, you feel it immediately. You might find yourself trapped dodging an open dishwasher just to reach the silverware drawer, or shuffling awkwardly between the refrigerator and the sink with a hot pan of boiling pasta. A bad layout turns cooking into a chore, making every meal prep feel like an obstacle course.
Conversely, a well-designed kitchen layout acts as an invisible assistant. It anticipates your movements, shortens your steps, and keeps high-traffic bottlenecks far away from the active cooking zones. Designing this kind of space does not require an advanced architectural degree or a multi-thousand-dollar design retainer. It requires understanding human ergonomics, mastering spatial geometry, and applying a few time-tested rules of home design.
Whether you are drawing plans for a complete kitchen gut renovation, reconfiguring a dated apartment galley, or trying to maximize storage in a modest suburban home, this guide walks you through every phase of designing a truly functional kitchen layout.
1. Understanding the Anatomy of a Kitchen Layout
Before drawing lines on graph paper or shopping for cabinets, you need to understand the fundamental building blocks of spatial planning. A great layout relies on two core concepts: the historical Kitchen Work Triangle and the modern Kitchen Work Zones methodology.
The Classic Kitchen Work Triangle
Invented in the 1940s by the University of Illinois School of Architecture, the kitchen work triangle connects the three primary task areas of the kitchen:
- The Refrigerator: The food storage and preservation center.
- The Sink: The prep, cleaning, and washing center.
- The Stove or Cooktop: The cooking and heat application center.
       [Refrigerator]
           /           \
         /              \
        /    Work    \
       /   Triangle   \
      /                     \
[Sink]-----------------[Stove]
The Golden Rules of the Work Triangle
- Leg Length: Each side of the triangle should measure between 4 feet and 9 feet.
- Total Perimeter: The sum of all three sides should measure between 12 feet and 26 feet.
- Clear Paths: No major traffic lanes or tall kitchen islands should cut directly through the middle of the triangle.
The Modern Evolution: Kitchen Work Zones
While the work triangle remains a helpful baseline, modern kitchens do much more than store, wash, and cook. Today’s households feature multiple cooks, baking stations, coffee bars, and homework zones. That is why professional designers now design around five distinct kitchen zones:
- Consumables Zone: The refrigerator, pantry cabinets, and food storage shelves. Keep this near the kitchen entrance so grocery unloading is effortless.
- Non-Consumable Zone: Storage for everyday plates, bowls, glassware, and flatware. This should be positioned near the dishwasher and dining area to make unloading fast and intuitive.
- Cleaning Zone: The sink, faucet, and dishwasher. This zone requires the most plumbing coordination and immediate access to trash and recycling bins.
- Preparation Zone: The primary stretch of uninterrupted countertop space where you chop vegetables, mix ingredients, and roll out dough. Ideally, this sits directly between the sink and the range.
- Cooking Zone: The cooktop, wall oven, range, and microwave. Keep hot pads, oils, spices, and pots stored immediately adjacent to this zone.
2. The 6 Standard Kitchen Layout Types
Every kitchen floor plan derives from one of six basic configurations. Choosing the right one depends entirely on your home’s square footage, architectural walls, and budget.
1. The Galley Kitchen (The Corridor)
- Best For: Small homes, apartments, urban townhouses, and single cooks.
- Layout Structure: Two parallel runs of cabinets and counters facing each other with a single walkway down the middle.
- Pros: Extremely efficient; minimal steps required between stations; highly cost-effective due to standardized cabinetry runs.
- Cons: Can feel cramped; limits multiple cooks from working simultaneously; dead ends if closed off on both sides.
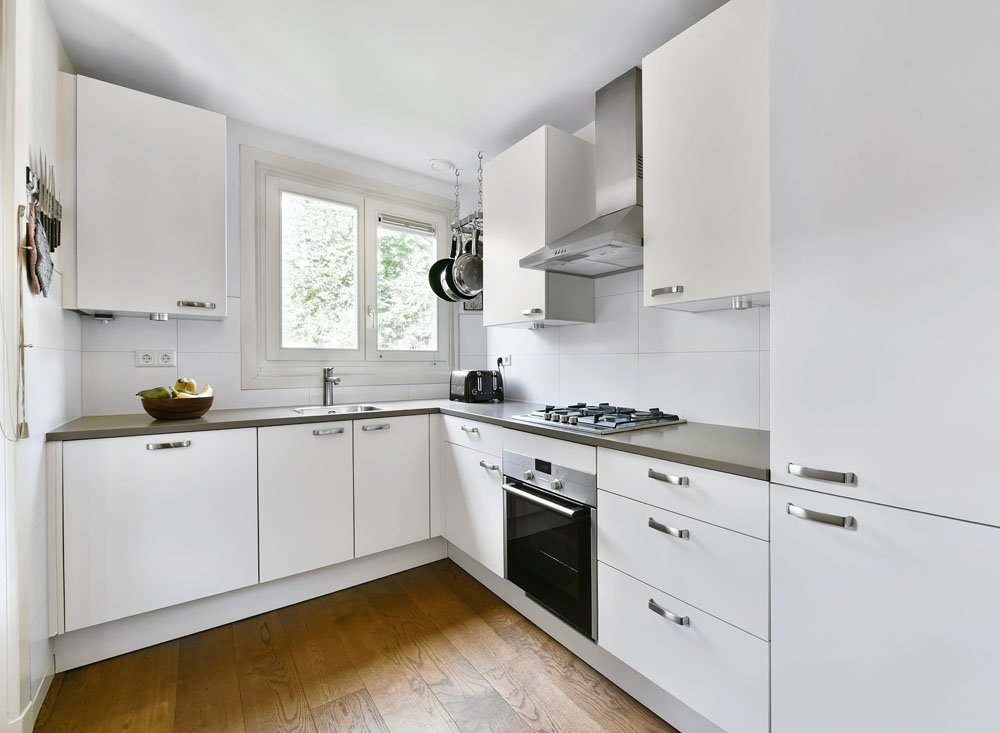
2. The L-Shaped Kitchen
- Best For: Open-plan living spaces, small to medium homes, and corner spatial configurations.
- Layout Structure: Cabinets arranged along two adjacent perpendicular walls, forming an “L.”
- Pros: Highly adaptable; opens up floor space for a dining table or island; eliminates through-traffic from the work zone.
- Cons: Corner base cabinets can become “black holes” without specialized pull-out hardware; long runs can stretch the distance between the fridge and stove.
3. The U-Shaped Kitchen (Horseshoe)
- Best For: Dedicated cooking spaces, medium-to-large kitchens, and serious home chefs who want maximum storage.
- Layout Structure: Cabinets and appliances wrapping around three continuous walls, resembling a horseshoe.
- Pros: Offers the most countertop space and cabinet storage of any standard layout; creates an incredible work triangle.
- Cons: Features two awkward corner junctions; can feel isolated if enclosed by four solid walls; requires at least 8 to 10 feet of open floor width between opposing counters so appliance doors do not collide.
4. The Single-Wall Kitchen (Straight-Line)
- Best For: Studio apartments, tiny homes, pool houses, and loft spaces.
- Layout Structure: All appliances, sinks, and cabinetry aligned against a single structural wall.
- Pros: Maximizes open floor space; highly affordable construction and plumbing costs; perfect for minimalist living.
- Cons: Extremely limited counter space; minimal separation between the cleanup sink and the cooking range.
5. The Peninsula Kitchen (The G-Shaped or Attached Island)
- Best For: Kitchens that want the benefits of an island without the square footage required for a freestanding structure.
- Layout Structure: An L-shaped or U-shaped layout with an attached countertop extension that juts out into the room, creating a partial barrier.
- Pros: Provides extra counter space and breakfast bar seating; clearly defines the kitchen boundary in an open-concept floor plan.
- Cons: Can create a traffic trap if the opening is too narrow; limits access to one side of the workspace.
6. The Island Kitchen
- Best For: Large, open-concept homes with at least 10 to 12 feet of clear room width.
- Layout Structure: A perimeter layout (L-shaped or straight-line) paired with a freestanding central workspace cabinet.
- Pros: The gold standard for modern entertaining; offers massive prep surface; accommodates sinks, dishwashers, and seating.
- Cons: Expensive; requires major electrical and plumbing runs routed through the subfloor; impossible to fit safely in narrow rooms.
3. Critical Dimensions and Clearance Rules
Spatial ergonomics separate amateur kitchen designs from professional masterpieces. Ignore these clearance rules, and you will end up with a kitchen where cabinet doors crash into one another and ovens cannot open fully.
| Measurement Zone | Recommended Minimum | Professional Standard | Why It Matters |
| Aisle Width (Single Cook) | 36 inches | 42 inches | Ensures comfortable walking room past lower cabinet pulls. |
| Aisle Width (Multi-Cook) | 42 inches | 48 inches | Allows two people to pass or work back-to-back safely. |
| Island Clearance | 36 inches | 42 to 48 inches | Prevents bottlenecks around high-traffic appliance doors. |
| Countertop Depth | 24 inches | 24 to 25 inches | Standard depth for upper and lower cabinetry runs. |
| Countertop Height | 36 inches | 36 inches | Standard ergonomic height for food prep standing up. |
| Backsplash Height | 15 inches | 18 inches | Protects walls from grease while fitting under-cabinet lighting. |
| Fridge Door Clearance | 15 inches | 18 inches | Allows refrigerator doors to open past 90 degrees for crisper drawer removal. |
4. Step-by-Step Guide: How to Design Your Kitchen Layout
Designing your kitchen layout requires patience and a methodical approach. Follow this proven workflow to take your kitchen from an empty shell to a finished blueprint.
Step 1: Measure and Map Existing Real Estate
Grab a heavy-duty tape measure, a notepad, and a laser measure if you have one. Measure every wall from corner to corner at floor height and counter height. Record the exact locations of:
- Windows (note the height from the floor to the sill so sinks do not block window openings).
- Doors and entryways (including swing arcs).
- Existing plumbing supply lines and drain stacks.
- Electrical outlets, light switches, and gas line stub-outs.
- HVAC vents, radiators, and structural support posts.
Step 2: Establish Your Budget and Priority List
Be realistic about your financial scope. A cosmetic layout adjustment (swapping appliance locations within existing plumbing) costs a fraction of moving a kitchen to a completely different wing of the house. Rank your non-negotiables: Is an island a must-have, or is counter space more valuable?
Step 3: Anchor the Major Appliances First
Never start designing by placing decorative open shelving or spice racks. Place your permanent utility anchors first:
- The Sink: Anchor this near existing plumbing stacks or a window with a view.
- The Range/Cooktop: Place this on an exterior wall if possible to vent exhaust fumes directly outside.
- The Refrigerator: Position this near the kitchen perimeter where family members can grab snacks without walking through the active cooking zone.
Step 4: Map the Countertop Prep Spaces
Once your appliances are locked in, designate your primary prep zones. You need at least a 36-inch continuous run of uninterrupted counter space immediately next to the sink and cooktop.
Step 5: Optimize Storage Architecture
Allocate vertical space based on frequency of use:
- Prime Real Estate (Waist to Eye Level): Everyday dishes, drinking glasses, coffee mugs, and frequently used spices.
- Lower Cabinets and Deep Drawers: Heavy pots, pans, mixing bowls, and small appliances (blenders, stand mixers).
- Upper Wall Cabinets / Tall Pantries: Seldom-used holiday platters, cookbooks, and bulk dry goods.
5. Equipment & Product Recommendations for Optimized Layouts
While layout is fundamentally about architecture, selecting the right appliances and hardware makes or breaks your spatial efficiency. Here is how our team evaluates layout-critical equipment.
Best Refrigerators for Tight Layouts
- Best Overall Counter-Depth:GE Profile Series Counter-Depth French Door Refrigerator
- Why We Chose It: At roughly 30 to 32 inches deep, it sits flush with standard cabinet runs, preventing a bulky appliance from blocking narrow aisleways.
- Best for Small Kitchens / Apartments:Bosch 800 Series Counter-Depth Bottom-Freezer Refrigerator
- Why We Chose It: Features hidden hinges and reversible doors designed specifically to open fully inside tight corridors without requiring massive side clearances.
Best Sinks & Faucets for Workflow
- Best Overall Single-Bowl Workstation Sink:Karran Quartz Undermount Workstation Sink
- Why We Chose It: Integrated ledges hold cutting boards and colanders directly over the basin, transforming a cramped prep station into a multi-tiered workspace.
- Best Pull-Down Faucet:Delta Leland Single-Handle Touch Faucet with Touch2O Technology
- Why We Chose It: When your hands are covered in raw chicken juice, tapping the spout with your wrist or forearm prevents cross-contamination on cabinet handles.
6. Common Kitchen Layout Mistakes to Avoid
Even seasoned DIYers fall into classic layout traps. Avoid these major planning errors:
- The Obstruction Trap: Placing the refrigerator or dishwasher directly across from an island with less than 36 inches of clearance, making it impossible to pull out interior shelves.
- Ignoring Landing Zones: Failing to provide at least 15 inches of clear counter space on the latch side of a refrigerator or next to a wall oven. You need a place to set hot trays down instantly.
- The Corner Clash: Installing standard lower cabinet doors in an L-shaped inside corner where the handle of one door smashes directly into the adjacent cabinet knob.
- Neglecting Lighting Layers: Relying on a single harsh fluorescent ceiling fixture instead of combining ambient lighting, task lighting under upper cabinets, and accent lighting.
- Stove Placement Against a Side Wall: Cramping a cooktop directly against a side wall leaves zero counter space to rest a spoon or slide hot pans off burners safely.
7. Expert Tips for Special Layout Scenarios
Designing for Small Spaces and Tiny Homes
In compact footprints, verticality is your best friend. Extend wall cabinets all the way to the ceiling with crown molding to eliminate dust-collecting dead space. Use pull-out pantry towers instead of wide shelving units to store maximum goods in minimal square footage.
Designing for Multi-Cook Families
If multiple people cook simultaneously, abandon the strict work triangle in favor of independent work zones. Create a secondary prep sink away from the main cleanup area so one person can wash vegetables while another operates the range.
8. Frequently Asked Questions (FAQ)
What is the most functional kitchen layout?
The L-shaped and U-shaped layouts are widely considered the most functional for general residential homes because they naturally create efficient work triangles and ample counter space. For open-concept spaces, an L-shape paired with a functional island is the gold standard.
How much space should be between an island and cabinets?
You should maintain a minimum of 36 inches for a single-cook kitchen, but professional designers strongly recommend 42 to 48 inches to allow appliances to open fully and multiple people to pass comfortably.
Can I put a stove on a kitchen island?
Yes, you can, but it requires careful planning. You must install an overhead range hood or a downdraft ventilation system, which requires routing ductwork through your subfloor or ceiling. It also eliminates the clean prep workspace that islands are typically prized for.
How do I fix a kitchen layout with bad corners?
Replace static blind-corner cabinets with modern hardware solutions such as magic corners, lazy Susans, or blind-corner pull-out trays that swing heavy pots and pans out into the room automatically.
What is the ideal height for a kitchen island?
Standard kitchen counters and islands sit at 36 inches high. If you plan to incorporate bar seating, raise the breakfast bar tier to 42 inches, or keep a single-level island at 36 inches with counter-height barstools.
9. Final Verdict
Designing a functional kitchen layout is an exercise in balancing human ergonomics, spatial geometry, and your personal cooking habits. By prioritizing clear work zones, respecting minimum aisle clearances, and anchoring your heavy appliances thoughtfully, you can turn even the most awkward floor plan into a smooth, efficient workspace. Take your time during the measuring and planning phase every hour spent fine-tuning your blueprints on paper saves days of frustration during construction.
10. Key Takeaways
- Zones Over Triangles: Modern kitchen design relies on five distinct work zones (Consumables, Non-Consumables, Cleaning, Prep, and Cooking) rather than just the traditional work triangle.
- Respect Clearances: Always maintain a minimum of 36 to 48 inches of aisle clearance so appliances open fully without creating traffic bottlenecks.
- Secure Landing Spaces: Never place an appliance without providing at least 15 inches of landing counter space immediately adjacent to it.
- Measure Twice, Cut Once: Accurate structural measurements of plumbing, electrical, and windows prevent costly remodeling mistakes later.